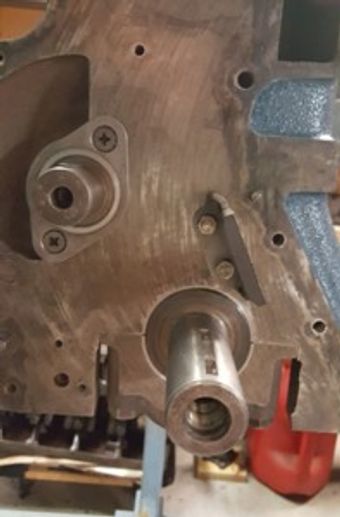
2017 - U20 00589 Rebuild
Jan 2017-Correct This Time
Jan 2017-Correct This Time
Jan 2017-Correct This Time

So, #321 came with engine # 00589 and matched its data plate. When I was building the clone, I didn't care about numbers or correct colors, but for this engine I will follow more correct items while building a solid running powerplant.
JAN 2017 - Rear Plugs
Jan 2017-Correct This Time
Jan 2017-Correct This Time

Rear plugs replaced. I had the block tanked and honed. Additionally, machine work included having the crank turned, and the assembly balanced with the flywheel and clutch.
Jan 2017 - Primed
Jan 2017-Correct This Time
Jan 2017 - Nissan Blue

Block primed.
Jan 2017 - Nissan Blue
Jan 2017 - Nissan Blue

Again, because this is a 67 2000, I painted the block with the Nissan/Datsun blue. Dean offers this paint formula in a spray can. It's a blue with a slight green look.
Jan 2017 - Water Plug

Installing drain water drain plug.
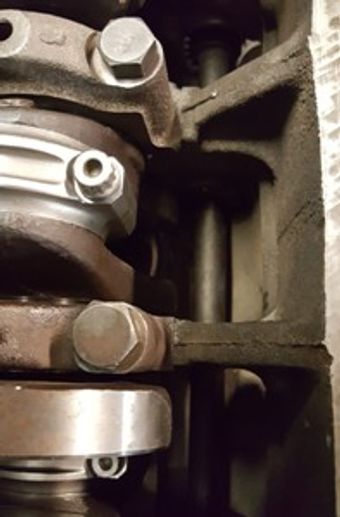
Jan 2017-Rear Bearing

As I mentioned the last time, I rebuilt a U20 when the Jackshaft bearings are pressed in the rear one has three places that the holes must align. I always check as I had one block done that was misaligned.
Jan-2017 Rear Main Seal
Jan-2017 Rear Main Seal

Rear main rope seal in.
Jan - 2017 Trim
Jan-2017 Rear Main Seal

The rope seal is soaked in oil, pressed in and then I rolled into place with a large socket. The end is then trimmed.
Jan - 2017 10 Under
Jan 2017 - Main Bearings

This was the other machine work I had outsourced. I had the crank turned 10 under on the rod and main journals and balanced with the rotating assembly.
Jan 2017 - Main Bearings
Jan 2017 - Main Bearings

Installing bearings into place. Bearings are sold STD or oversized for machining. Since the crank is ten under these are 10 over to bring it back to correct tolerance.
Jan 2017- Ready for Crank
Jan 2017- Ready for Crank

Some assembly lube and ready for crank.
Jan 2017- Crank In
Jan 2017- Ready for Crank

Crank was wiped down for final journal cleaning and dropped in.
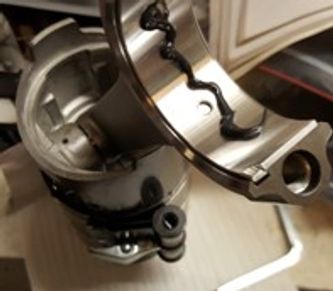
Feb 2017- Ring Gap

Slid the ring into the cylinder to measure ring gap.
Feb 2017- Squaring Ring

Using the piston to square the ring for measurement.
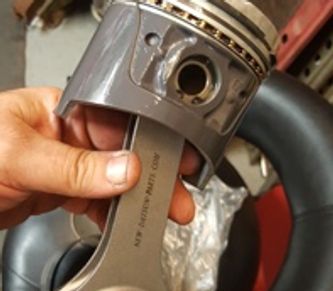
Feb 2017- Pistons
I bought new flat top pistons and new H beam rods from New Datsun Parts. I sent the pistons off to Swain coating and had the domes TBC ceramic coated and the skirts were treated with PC-9.
Feb 2017- Oiled
Feb 2017- Rings Compressed
I oiled the piston for install and the skirt coating seems pretty slick.
Feb 2017- Rings Compressed
Feb 2017- Rings Compressed
Feb 2017- Rings Compressed
Rings compressed and some assembly lube to spread out on the bearing.
Feb 2017- Rod Bolts
Feb 2017- Rings Compressed
Feb 2017- Rings Compressed
The New Datsun Parts rods are nice, and they save weight as well. ARP style bolts for easy torque.
Feb 2017- One Down
1st piston in. This is a great shot of the Swain TBC ceramic coating.
Feb 2017- Pistons Done
All pistons in and crank rotates nice and smooth.
Feb 2017- Pressure Adapter

I mentioned this in the last motor rebuild, but don't forget to put this restrictor in so the bottom chain tensioner has oil pressure.
Feb 2017- Jackshaft
I put assembly lube on the jackshaft bearings and installed the unit.
Feb 2017- Jackshaft In
Feb 2017- Retaining Plate
The jackshaft drives the oil gear/timing gear and has a lobe to drive the manual fuel pump.
Feb 2017- Retaining Plate
Feb 2017- Retaining Plate
Jackshaft retaining plate on as well as the lower chain guide.
Mar 2017- New Chains
Mar 2017- Upper Guide
Mar 2017- Upper Guide
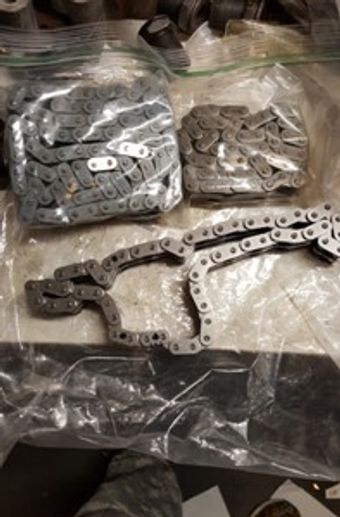
I had new Nissan chains, but I bought JT's heavy-duty chains from Datsun Restoration Products (DRP). These chains are NICE!
Mar 2017- Upper Guide
Mar 2017- Upper Guide
Mar 2017- Upper Guide
I also had plenty of usable guides but since I have put so much time and money into this motor I bought a new upper guide.
Mar 2017- Modifying
Mar 2017- Upper Guide
Mar 2017- Modifying
All I really do is cut off the L (marked for cutting) and use a modified piece that basically sits in place and pulls out after the gear is secured to the cam. Back in my 510 days we would just wedge the chain, so it didn't move while removing head.
Mar 2017- Evil L
Mar 2017- Chain Guide
Mar 2017- Chain Guide
Ready to go.
Mar 2017- Chain Guide
Mar 2017- Chain Guide
Mar 2017- Chain Guide
Upper Chain guide on and security tabs locked in.
Mar 2017- Upper Chain
Mar 2017- Chain Guide
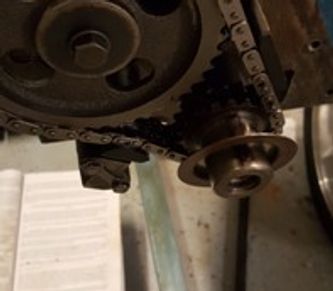
Mar 2017- Gear & Chain Alignment
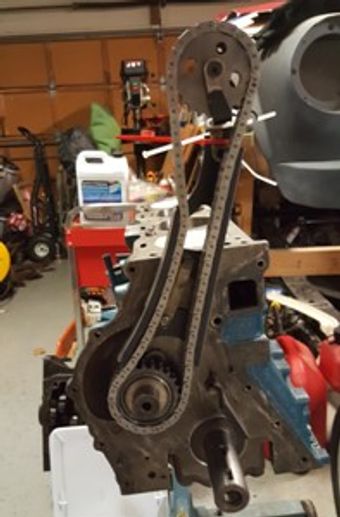
JT (DRP) sells an adjustable cam gear; you can see the slots in the gear.
Mar 2017- Gear & Chain Alignment
Mar 2017- Gear & Chain Alignment
Mar 2017- Gear & Chain Alignment
To install the lower chain, you have to ensure the gears are aligned.
Mar 2017- Not Aligned
Mar 2017- Gear & Chain Alignment
Mar 2017- Not Aligned
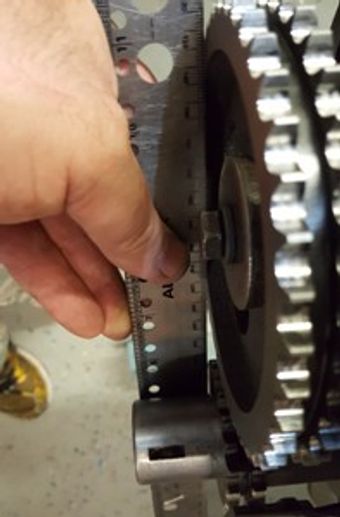
Notice with the straight edge on the gears the lower gear is back too far (you can see the light between the two).
Mar 2017- Add a Shim
Mar 2017- Gear & Chain Alignment
Mar 2017- Not Aligned
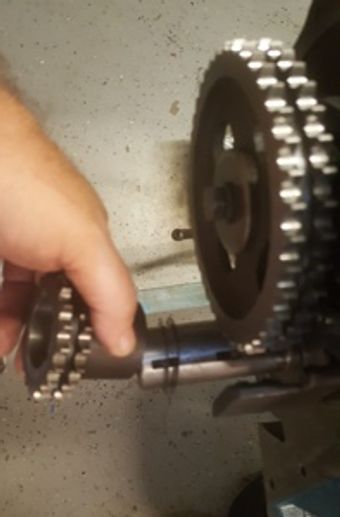
Adding a second shim behind gear to move it forward.
Mar 2017- Aligned
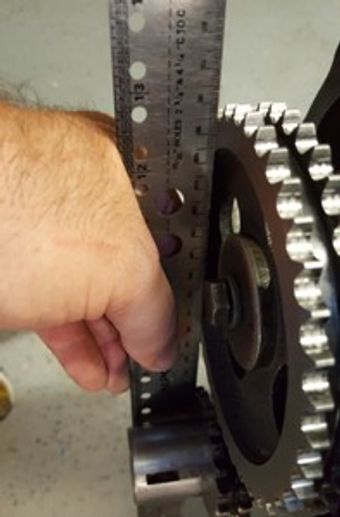
Same check and no visible gap.
Mar 2017- Checking Position
Because there are 4 gears and two chains there are many steps to correct install. The best advice is getting a copy of Scott Sheeler's Roadster books as there is a step by step for chain install and checks. Notice I put black marks on my chain. The Nissan chain has a dimple.
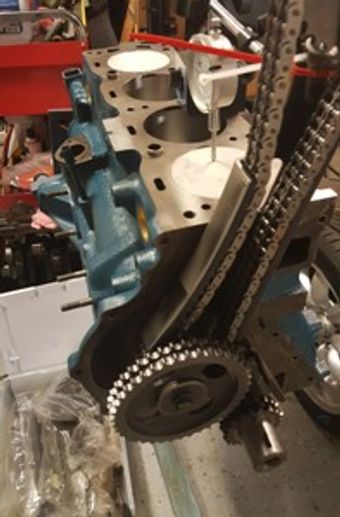
Mar 2017- Chains Complete

Chains are in and verified for correct alignment.
Mar 2017 - Oil Slinger
With the crank drift keys in place, I slid the oil slinger on.
Mar 2017-Adjustable Gear
Better look at the DRP adjustable gear.
May 2017- Front Cover
Cleaning and polishing front cover.
May 2017- Cover Bolts
#321 was really rusty. The front cover bolts are various lengths, so I want to be able to reuse.
May 2017- Evapo-rust

Soaking all of the bolts in Evapo-rust.
May 2017- Cleaned
Made a huge difference removing the corrosion.
May 2017- Plating
I built a large plating station, but didn't want to break it out for a few small bolts so I'm trying Eastwoods simple plating system.
May 2017- Acceptable
May 2017- Paste Polish
A before and after. While nowhere near as effective as my larger plating tank, this system did just fine with only two D batteries.
May 2017- Paste Polish
May 2017- Paste Polish
A quick polish with some metal paste and they are ready to install.
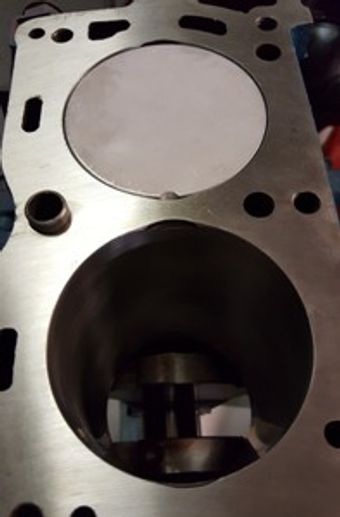
May 2017- TDC
May 2017- Head Gasket Check
May 2017- Head Gasket Check
With the front cover on I was able to install a new harmonic balancer (from DatsunParts.com). If the chains and gears are correct the balancer lands at 0 to the pointer.
May 2017- Head Gasket Check
May 2017- Head Gasket Check
May 2017- Head Gasket Check
Checking the head gasket to ensure all passageways and holes match.
May 2017- No Studs
May 2017- Head Gasket Check
May 2017- Ready for Head
I removed the two top threaded studs from my front cover. If you choose to use them it's almost impossible to remove the front cover without removing the head.
May 2017- Ready for Head
May 2017- Ready for Head
May 2017- Ready for Head
Final Cleaning and ready for head.
May 2017- Rebello
May 2017- Ready for Head
May 2017- Rebello
Since this motor is an important part of the heritage of a 67 2000, I decided to send the head to Rebello Racing for a rebuild and upgrade.
May 2017- Head On
May 2017- Ready for Head
May 2017- Rebello
The work on the head was so clean and I'm anxious to see how it performs. By the way, that's the clones U20 in the background, I fire it up every month or so.
May 2017- Upper Tensioner
Prepping the chain tensioner to drop it in.
May 2017-Dropped In
Lower in, install bolts, and cut zip tie...done.
May 2017-Rbello 63DE Grind
I sent Rebello a non-smog head and a B cam. Their work included new oversized valves and new seats/guides and a 63DE grind. With the new pistons and performance head I should get a solid performing engine.
May 2017- Oil Pump
Oil pump cleanup for install.
May 2017- Oil Drive Gear
May 2017- Oil Drive Gear
When dropping the oil drive gear in place it does a slight twist as it engages. The goal is to end up with the dizzy drive side landing at the 11:25 position.
May 2017- 1 Tooth
May 2017- Oil Drive Gear
This is the difference of 1 tooth difference when engaging the gear.
May 2017- Dizzy Tower
To lock the drive gear in place I installed the Dizzy tower.
May 2017-Oil Filter Mount
Oil Filter Mount cleaned up.
May 2017- Installed
Jul 2017- Water Pump
Installed on motor. I will add the anti-drain back tube later.
Jul 2017- Water Pump
Jul 2017- Pass Motor Mount
Jul 2017- Water Pump
Installed a new water pump.
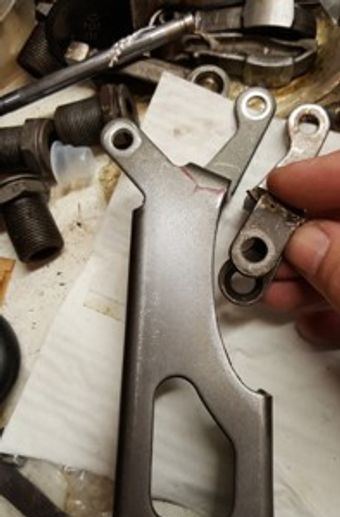
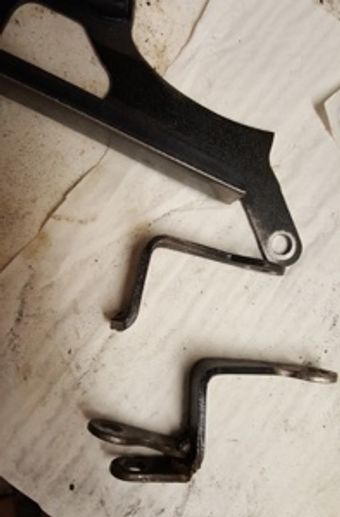
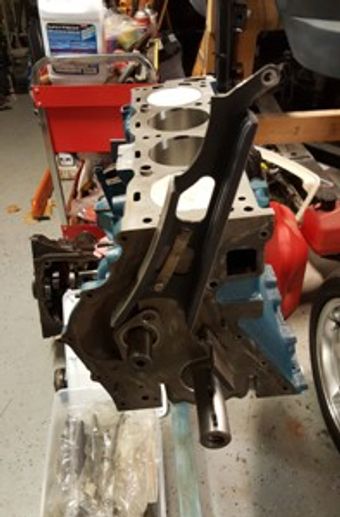
Jul 2017- Pass Motor Mount
Jul 2017- Pass Motor Mount
Jul 2017- Pass Motor Mount
Pass side motor mount on.
Jul 2017-Drive Motor Mount
Jul 2017- Pass Motor Mount
Jul 2017- Pass Motor Mount
Drivers side motor mount has a different angle.
Jul 2017- East Coast EI
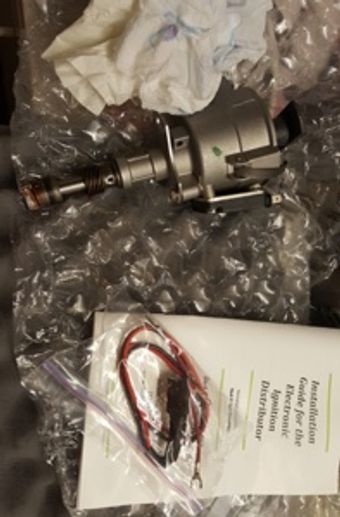
The clone car has a Gary Boone EI Dizzy. This unit is built by East Coast Dizzy's who took over the GB process.
Jul 2017- A/R
The dizzy tower has some adjustment built in from Advance to Retard clearly marked.
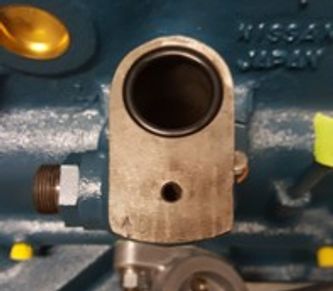
Jul 2017- Dizzy In
Another check that I'm set up correctly. Dropping the Dizzy in to engage the oil drive gear with the engine at TDC notice that the dizzy pointer is directly in the middle when installed correctly.
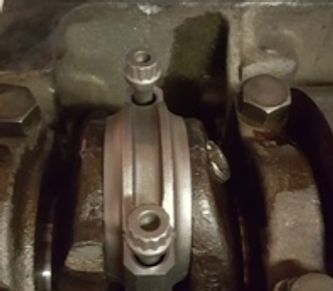
Jul 2017-Installing Rockers

Installing the Rockers as marked for each cylinder.
Jul 2017- Adjusting Lash
Setting the lash per the Rebello notes.
Jul 2017- Lobe
Rebello measurements on each lobe.
Jul 2017- Sealing It Up
Closing up all openings until I get to the next stage on the motor.